
POS Network Requirements for Restaurants: Complete Infrastructure Guide 2026
Updated: January 2026 | By Max Artemenko, POS Systems Expert & Product Architect Quick Summary: What You Need to Know
 Skip to content
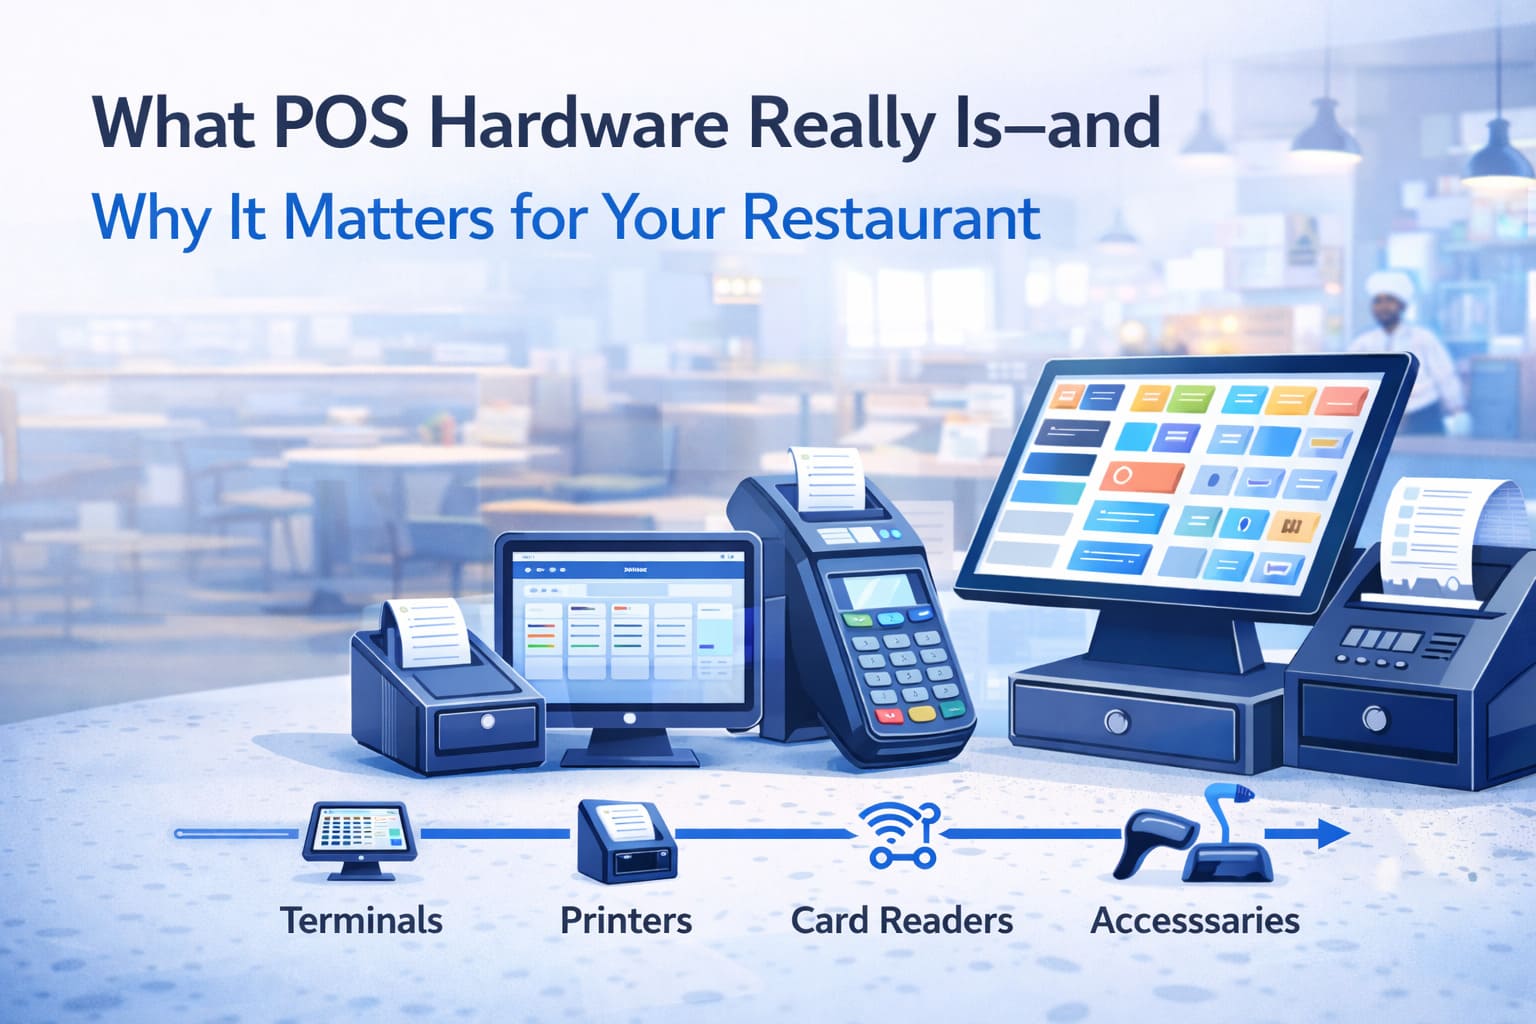
POS hardware is the physical backbone of your point-of-sale system. It’s not just a terminal and a card reader—it’s the complete infrastructure: terminals, printers, cash drawers, payment devices, kitchen displays, scanners, network equipment, and backup power. Without solid hardware, your software sits idle and your business grinds to a halt.
Here’s the reality: I’ve watched restaurants drop $15,000 on sophisticated POS software, then cheap out on hardware and wonder why transactions fail during Friday night rush. Hardware isn’t glamorous—nobody talks about it at industry conferences—but it’s what separates smooth service from frustrated customers waiting for receipts.
The core purpose of POS hardware is straightforward:
When you invest in the right hardware, you’re buying speed, reliability, and the ability to scale. You’re buying peace of mind that your system won’t choke during peak hours.
Before diving into specifics, here’s the foundation checklist every restaurant should evaluate. Use this as your starting point—not every item applies to every venue, but these categories cover most restaurant scenarios.
Core (Essential for all restaurants):
Extended (Most restaurants):
Specialized (Depends on format):
| Component | Primary Role | Status | Suitable For |
|---|---|---|---|
| POS Terminal | Order entry, payment processing | Mandatory | All restaurants |
| Payment Reader | Card/NFC transactions | Mandatory | All accepting cards |
| Receipt Printer | Customer/kitchen tickets | Mandatory | All restaurants |
| Cash Drawer | Physical cash management | Mandatory | All handling cash |
| KDS/Kitchen Printer | Order routing to kitchen | Essential | QSR, Fine Dining, Full-Service |
| Customer Display | Order confirmation, tipping | Highly Recommended | All restaurants |
| Barcode Scanner | Inventory, retail items | Optional | High-volume, multi-SKU venues |
| Handheld Terminal | Tableside ordering/payment | Optional | Full-Service, upscale |
| Integrated Scale | Weighted items, deli counters | Optional | Cafes, bakeries, delis |
| UPS/Backup Power | System continuity | Highly Recommended | All locations |
Your terminal is where every transaction starts. It’s either the hero that keeps your restaurant humming or the bottleneck that grinds everything to a halt. Your choice between stationary and mobile shapes everything else.
An all-in-one (monoblock) terminal combines the CPU, display, ports, and sometimes peripherals into one rugged unit. You mount it on the counter, connect the printer and cash drawer, and it handles everything from that one fixed location.
What you get:
Real-world scenarios:
When all-in-one makes sense:
The trade-off: higher upfront cost, but lower total cost of ownership over 5–7 years due to reliability and durability compared to consumer-grade equipment.
I worked with a 40-seat Italian restaurant that tried to save money by using an iPad at the host stand. During a private event, the tablet overheated, the app crashed, and they lost 20 minutes managing reservations and seating. They switched to a stationary terminal the following week. The extra investment eliminated that entire class of failure.
A tablet (iPad or Android) running POS software gives you mobility. Your servers take orders tableside, your kitchen staff can view orders on a wall-mounted display, and you can manage everything from anywhere in the restaurant.
Typical setup:
Real-world scenarios:
When tablets make sense:
The catch: tablets need infrastructure. If your Wi-Fi is unreliable, a tablet POS becomes a liability. I’ve seen restaurants go back to paper tickets because their network couldn’t keep up—not because the software was bad, but because the hardware (specifically, the Wi-Fi) failed.
Hybrid approach: Many restaurants run a mix—a stationary terminal or two at the host stand for speed, plus one or two tablets for flexibility. This gives you the best of both worlds.
Your payment terminal is the gateway between your customer’s card and your bank account. Get this wrong, and you’re exposed to fraud, chargebacks, and compliance failures. Get it right, and you process payments quickly and securely.
EMV (Chip) support is non-negotiable. EMV (Europay, Mastercard, Visa) uses cryptography to prevent counterfeit fraud. The US finished its migration years ago—EMV readers are now baseline.
NFC/Contactless (tap-to-pay, Apple Pay, Google Pay) is now standard. Customers expect it. It’s fast, secure, and reduces physical contact.
P2PE compliance (Point-to-Point Encryption) means your payment data travels encrypted end-to-end, and you never store raw card numbers. This dramatically reduces your PCI DSS liability.
Tokenization replaces the actual card number with a token for online transactions. If a hacker breaches your system, they get a useless token, not a live card number.
Stationary PIN pad (countertop): Connected via USB or Ethernet, fixed at your main register. Common for QSR and fast-casual where customers hand you the card.
Wireless PIN pad (handheld): Bluetooth or Wi-Fi, with a dock charger. Staff carries it to the table, processes payment in front of the customer. More flexible, requires good Wi-Fi.
Integrated reader: Some all-in-one terminals have the reader built in. Fewer cables, one less thing to integrate.
Compatibility matters. Your reader must work with your processor (First Data, Global Payments, Shift4, Chase, etc.). Don’t assume. Ask the vendor for a compatibility matrix before ordering.
In practice, I’ve installed 100+ payment systems with multiple reader types. The most common mistake: ordering a reader that’s technically EMV-capable but not certified with your processor. It works for manual entry, fails for chip reads. Verify certification before you buy.
Information in this section is general in nature and does not replace consultation with a payment processing specialist.
Order tickets flow three ways: to the customer (receipt), to the kitchen (order ticket), and sometimes to the bar. Each path has different needs.
Thermal printers are the standard. They’re quiet, fast, and reliable.
Key specs:
What to look for:
I’ve seen restaurants choose the wrong printer and then spend 6 months dealing with paper jams, cut errors, and support tickets. A $400 printer from a reputable vendor beats a $200 printer that requires weekly troubleshooting.
This is a real choice point.
KDS (Kitchen Display System):
Impact (Dot-Matrix) Printers:
Reality check: KDS is faster and cleaner if your kitchen staff is trained to watch the screens. Impact printers are bulletproof if your Wi-Fi is unreliable or your team prefers paper tickets.
Most restaurants I work with now use KDS because they’re faster, more flexible, and integrate with online orders (delivery apps route directly to the KDS). But I’ve also installed impact printer backups—when the Wi-Fi hiccups, you’ve still got tickets printing.
Recommendation: Start with KDS. Add an impact printer as a backup if your kitchen values the audible signal.
A cash drawer holds your physical money. It sounds simple—and it is—but it’s also a failure point if you don’t choose carefully.
Modern cash drawers open via electrical signal from your printer or terminal. When a transaction completes, the system sends a signal, the drawer pops open, and your cashier makes change.
Connection types:
Build quality: Steel or stainless-steel construction. Flimsy plastic drawers wear out fast and feel cheap.
Compartments: 4–8 sections for bills, 5–8 coin slots. More sections = easier cash management and reconciliation.
Media slot: Some drawers have a slot for storing receipts or small items. Nice to have, not critical.
Mounting: Undercounter, on top of a terminal, or freestanding. Choose based on your counter layout.
3-position lock: Three security positions—open, closed-unlocked, closed-locked. Better than simple lock/unlock.
Compatibility: Must work with your printer or terminal. Most printers trigger via RJ-12 signal, so verify your printer and drawer both support the same interface.
Size: Standard is about 410mm wide × 100mm deep × 110mm tall. Fits most counters. Verify before you order.
I’ve installed probably 200 cash drawers. The most common issue: operator error. Cashiers don’t realize the drawer needs to be empty to close properly, or they force it and break the latch. Training matters as much as hardware.
This is the screen your customer sees after they pay. It shows the total, the tip prompt, and sometimes promotional content.
Size and placement:
What it does:
Why it matters:
Integration: Must support your POS software. Most modern systems work with standard HDMI or USB displays. Verify compatibility before you buy.
Explore our interactive customer display for detailed capabilities and integration options. From a revenue perspective, customer-facing displays improve customer experience and can drive incremental transaction value through clear, easy-to-use interfaces.
If you sell packaged items (bottles of wine, coffee beans, retail merchandise), a barcode scanner saves time and prevents errors.
1D scanners read traditional barcodes (lines and spaces). Fast, cheap, reliable for simple scenarios.
2D scanners read QR codes and more complex barcodes. Slower data entry, but more flexibility. Can integrate with delivery apps (Uber Eats QR codes, for example).
For most restaurants, a 2D scanner is worth the extra $50–$100. You’ll use it for:
Learn more about our barcode scanner options and integration capabilities.
USB: Direct connection to the terminal. Standard, reliable.
Bluetooth: Wireless. Nice for mobility (scanning items on shelves), but adds complexity.
Presentation mode: The scanner stays stationary, and items are passed over it (instead of the scanner being handheld). Useful for high-volume retail.
If your scanner lives in the kitchen or storage area, it needs protection.
IP rating: IP54 or better means dust and moisture protection. Look for this if your scanner works near prep areas or walk-ins.
Drop-tested: Commercial scanners are usually tested to survive occasional drops. Cheap consumer scanners aren’t.
Your barcode scanner doesn’t need to talk to anything sophisticated. It just sends keystrokes—the scanner reads the barcode and types the item code into your POS. Basic USB scanners work with almost any system.
If you run a deli counter, bakery, or café with weighed items, integrated scales speed transactions and reduce error.
How they connect:
What to verify:
Learn more about our digital scales integration for cafe operations.
Real scenario: A bakery with 40+ item SKUs using scales saves 2–3 seconds per transaction compared to manual entry. Over 500 daily transactions, that’s 20+ minutes of throughput. The scale pays for itself in reduced labor and faster service.
For full-service restaurants, servers take orders on handheld tablets or devices, then send them to the kitchen. This reduces errors (no miscommunication between server and bartender) and speeds service.
What you need:
Integration: Works with your main POS. Orders sync in real-time to the kitchen display. Explore mobile ordering & payment solutions for tableside service efficiency.
You can have perfect terminals and printers, but if your network and power are unstable, everything fails.
Internet connection: Your POS needs reliable uplink for:
Bandwidth considerations:
Wi-Fi: If you’re using tablets or handheld devices, Wi-Fi quality is critical.
Network segmentation (VLAN): Separate your payment traffic from general business Wi-Fi. This is a recommended best practice for minimizing risk and supporting PCI DSS compliance through network isolation, though there are multiple approaches to achieve compliance depending on your architecture.
Ethernet for stationary devices: Don’t rely on Wi-Fi for your main terminals. Wired is faster, more reliable, and more secure.
In my experience, a significant portion of POS problems trace back to network infrastructure rather than the POS software or terminal hardware itself. A stable Wi-Fi connection or consistent internet uptime will prevent more operational issues than any single hardware component.
A Uninterruptible Power Supply keeps your system running during brief outages and gives you time to gracefully shut down during extended losses.
Minimum specs:
Coverage: Connect your main terminal(s), POS server (if you have one), network equipment, and KDS.
You don’t need backup power for every terminal. One UPS per location can cover essentials.
Real scenario: A power flicker (literally seconds) crashes a terminal. Without UPS, the transaction is lost, cash reconciliation fails, and you’re down until you troubleshoot. With UPS, the system stays up, and you complete transactions normally.
Priorities: Speed, reliability, throughput, minimal complexity.
Typical setup:
Why this works: QSR is high-transaction-volume and time-sensitive. Every second counts. Stationary terminals are faster than tablets because there’s no network search, no connection lag, no battery drain concerns. They’re also cheaper to maintain (fewer moving parts).
Market context: According to research from industry sources, 55% of limited-service operations (QSR/fast-casual) plan to upgrade or invest in new POS technology in 2025. For QSR operations, explore our quick-service POS system solutions designed specifically for high-volume environments.
Priorities: Flexibility, accuracy, tableside experience, integration with bar/kitchen coordination.
Typical setup:
Why this works: Full-service needs flexibility. Servers move around. Orders need precision. Customers expect individual attention (including tableside payment). KDS is faster than paper tickets because the kitchen sees orders instantly without waiting for a server to walk over.
Market context: Industry research indicates that 50% of full-service establishments plan to invest in POS upgrades in 2025. Servers benefit significantly from mobility features. Explore our table service POS solutions tailored for full-service operations.
Priorities: Speed, durability, payment flexibility (cash + cards + tips), IP protection (spills).
Typical setup:
Why this works: Bars take a lot of physical punishment. Water, liquor, and cash handling are normal. You need rugged hardware. Wireless readers let bartenders charge at the table or bar, which fits the service model. High-volume, high-tip environment means the customer display is essential.
Discover our bar POS systems designed for nightlife venues.
Priorities: Compact footprint, item variety, retail integration, simplicity.
Typical setup:
Why this works: Cafes have limited counter space and high transaction velocity. Compact, simple hardware is key. Scales and scanners automate item pricing. You don’t need handhelds; everything happens at the counter. Explore our coffee shop POS solution for cafe operations.
Here’s a hard truth: great software running on incompatible hardware will fail. You need to verify three things before you order anything.
Your POS vendor publishes a list of hardware they’ve tested and certified. Start there. Don’t assume a device is compatible just because it’s popular or you found it on Amazon.
Example: SkyTab publishes certified iPad models, approved card readers, and tested printers. If you buy a used iPad that’s three generations old, it might not run the latest SkyTab software. You’ll waste time troubleshooting instead of running service.
What to ask your vendor:
Even certified hardware sometimes needs driver updates or firmware patches.
Example: Your thermal printer works fine for a month, then starts cutting tickets halfway through. A firmware update from the printer manufacturer fixes it. But you need to know how to apply the update, and your POS vendor needs to confirm the update doesn’t break the POS connection.
What to verify:
Payment processing is the most critical integration. Your processor (Shift4, First Data, Chase, etc.) must certify your hardware and POS software combination.
Example: You buy a POS system and a card reader. Both are individually certified. But the POS vendor doesn’t integrate with your processor, or they do but haven’t tested the specific hardware combination. Result: chip reads fail, you fall back to manual entry, security risk.
What to require:
Learn about our credit card payment processing options and processor integrations.
I’ve spent weeks troubleshooting setups where hardware was technically compatible but the integration wasn’t fully tested. Save yourself the headache: require written certification before you buy.
Payment card security isn’t optional. It’s the law. Here’s what PCI DSS requires of your hardware:
EMV Certification: Your card reader must be EMV-certified (Level 2 minimum). This means it’s been tested to prevent counterfeiting and data tampering.
P2PE Compliance: Payment data should be encrypted end-to-end. The card data never appears unencrypted on your system.
Network Segmentation: Isolate payment traffic on a separate VLAN from general business traffic. This limits the blast radius if someone breaches your guest Wi-Fi.
Physical Security: Terminals and card readers must be in places where staff can verify they haven’t been tampered with. Don’t put a card reader in a public restroom where a skimmer could install hardware.
Firmware Updates: Your payment hardware must receive security updates regularly. Old firmware is a liability.
Information in this section is general in nature and does not replace consultation with a qualified security professional or PCI compliance specialist for your specific restaurant environment.
For most restaurants, your POS vendor handles most of this. But you need to:
This is where theory meets reality. Installation is rarely smooth, but preparation prevents most problems.
Wi-Fi weakness: 50% of installation problems are Wi-Fi-related. Do a site survey before installation. If the POS terminal is 30 feet from the router with three walls in between, it will struggle.
Printer driver issues: Windows and macOS are especially prone to printer driver conflicts. Make sure the driver version matches your OS version.
Card reader certification: Your processor might reject the card reader if the firmware isn’t updated. Do this during installation, not after launch.
Power outlet overload: If you plug everything into one outlet, you risk brownouts. Use a proper UPS and distribute loads across multiple circuits.
Staff training time: Don’t underestimate. Even simple POS requires 2–3 hours of hands-on practice for each staff member. Budget accordingly.
I’ve installed dozens of systems. The ones that go smoothly are the ones where the restaurant did the prep work: network testing, staff communication, space preparation. The messy ones always skip these steps and pay for it in launch chaos.
You find a terminal that’s $2,000 cheaper than the one your vendor recommends. You buy it. Three months later, it’s not certified with an update, the printer connection is flaky, and vendor support blames the hardware.
Solution: Compare total cost of ownership, not just upfront cost. Add warranty, support, expected lifespan, and replacement costs. Cheap hardware often has higher TCO.
You buy a perfect POS setup, but your Wi-Fi is unstable. Tablets drop connection, KDS displays flicker, handhelds time out.
Solution: Network is as critical as the POS terminal. Budget for business-class equipment. Test Wi-Fi coverage before you buy any tablets or wireless hardware.
You get new hardware, give a 30-minute demo, and launch. Staff makes mistakes (forgot to open the drawer, charged the wrong card, didn’t route order to kitchen).
Solution: Schedule 2–3 hours per staff member. Include opening/closing procedures, payment exceptions, troubleshooting basic issues. Build a quick-reference guide.
You buy 5 terminals, 10 handheld devices, and a KDS when you actually need 2, 2, and 1. The rest sit in a closet.
Solution: Start with core hardware. Add as you grow. It’s cheaper to phase in than to have excess equipment languishing unused.
Your main printer fails. You’re down 4 hours waiting for a replacement. Tickets pile up, kitchen gets backed up, customers wait.
Solution: Keep a spare thermal printer on-site. Keep a spare card reader. For critical operations, keep a spare terminal. Budget for this—it’s cheap insurance.
You install new hardware and go live immediately. First night, Wi-Fi glitches, a refund fails, and nothing’s been tested.
Solution: Run 24–48 hours of limited service (lunch shift only, limited menu) before full launch. Catch issues before peak service.
To illustrate how all this comes together, here’s a practical example:
The restaurant: Three casual sit-down locations in the Southeast. 60–80 seats each, full menu, bar, 30–40 staff per location. Previously used legacy systems from the 2000s.
The challenge: Aging hardware, manual inventory, inconsistent check procedures across locations, no online ordering integration.
Hardware selected:
Implementation timeline:
Actual costs:
Results (3 months post-launch):
The glitches:
Lessons learned:
Simple restaurants (1 location, 20–40 seats): $3,000–$8,000 for core hardware (terminal, reader, printer, drawer). Add another $2,000–$3,000 for software and installation.
Mid-size (2–3 locations, 60+ seats): $8,000–$15,000 in hardware per location, depending on whether you want handheld devices and KDS.
Multi-location chains: $12,000–$25,000+ per location if you’re adding inventory, loyalty integration, or sophisticated KDS.
These are hardware-only costs. Factor in software licensing, ongoing support, and recurring fees.
Typical hardware budget breakdown:
Technically, yes. Practically, it’s risky.
Problems:
Better approach: Use the POS vendor’s recommended hardware list. The few hundred dollars you save on a personal device will cost you in troubleshooting and downtime.
Maintenance matters. Dust buildup, temperature extremes, and improper handling shorten lifespan. Keep terminals out of direct sunlight, away from heat sources, and in a cool environment.
Cash register: Adds up the sale, prints a receipt, opens a drawer. One function: record the transaction.
POS system: Manages menu/pricing, routes orders to kitchen, integrates with inventory/accounting, tracks staff performance, supports online orders, generates reports, coordinates payments. Dozens of functions.
Real difference: A cash register is hardware. A POS system is hardware + software + integrations. You can survive on a cash register. To run a modern restaurant efficiently, you need a POS system.
If your terminal crashes mid-service:
Prevention is better: Have backup hardware. A spare tablet costs $300–$500. Downtime costs 10x that.
For most restaurants: start with KDS. It’s faster, more flexible, and integrates better with modern order systems.
Keep an impact printer as a backup. When the Wi-Fi hiccups, you still have tickets.
Scenarios where you skip KDS:
Cost: $6,000–$12,000 in hardware, depending on quality choices.
SkyTab’s iPad-based architecture is flexible and clean. You get mobility, simplicity, and strong integrations. But it requires:
If your Wi-Fi is solid and your team is tech-comfortable, SkyTab is a strong choice.
If you’re evaluating POS hardware for your restaurant right now:
Hardware is unsexy. Nobody gets excited about a new cash drawer. But when it works, your restaurant runs smoothly. When it fails, everything stops. Choose wisely.
Updated: January 2026 | By Max Artemenko, POS Systems Expert & Product Architect Quick Summary: What You Need to Know

Updated: January 2026 By Max ArtemenkoPOS Systems Expert & Product Architect | 12+ years in restaurant operations and POS implementations

© 2025 Smart Payment Solutions – All Rights Reserved


